Scrollviews are a nice tool to have inside our apps, SwiftUI has been helpful to make them use easier unlike UIKit. Unfortunately many apps still using UIKit, so we need to know how to work with them.
We don’t need to be experts to add them to our current app, although it is hard in case we already have a very complex app with many components, so maybe it could be good to add them in the first instance.
So let’s see a quick and easy way to add a ScrollView using Storyboards.
Before the start I like to give a special mention to Alex Diaz, first of all, because he let me use his example to create this post, he is already through his Swift Journey and if you want to see how is a journey of an iOS dev or start creating your network/connections through this amazing community I encourage you to follow him!.
Add a ScrollView to your ViewController

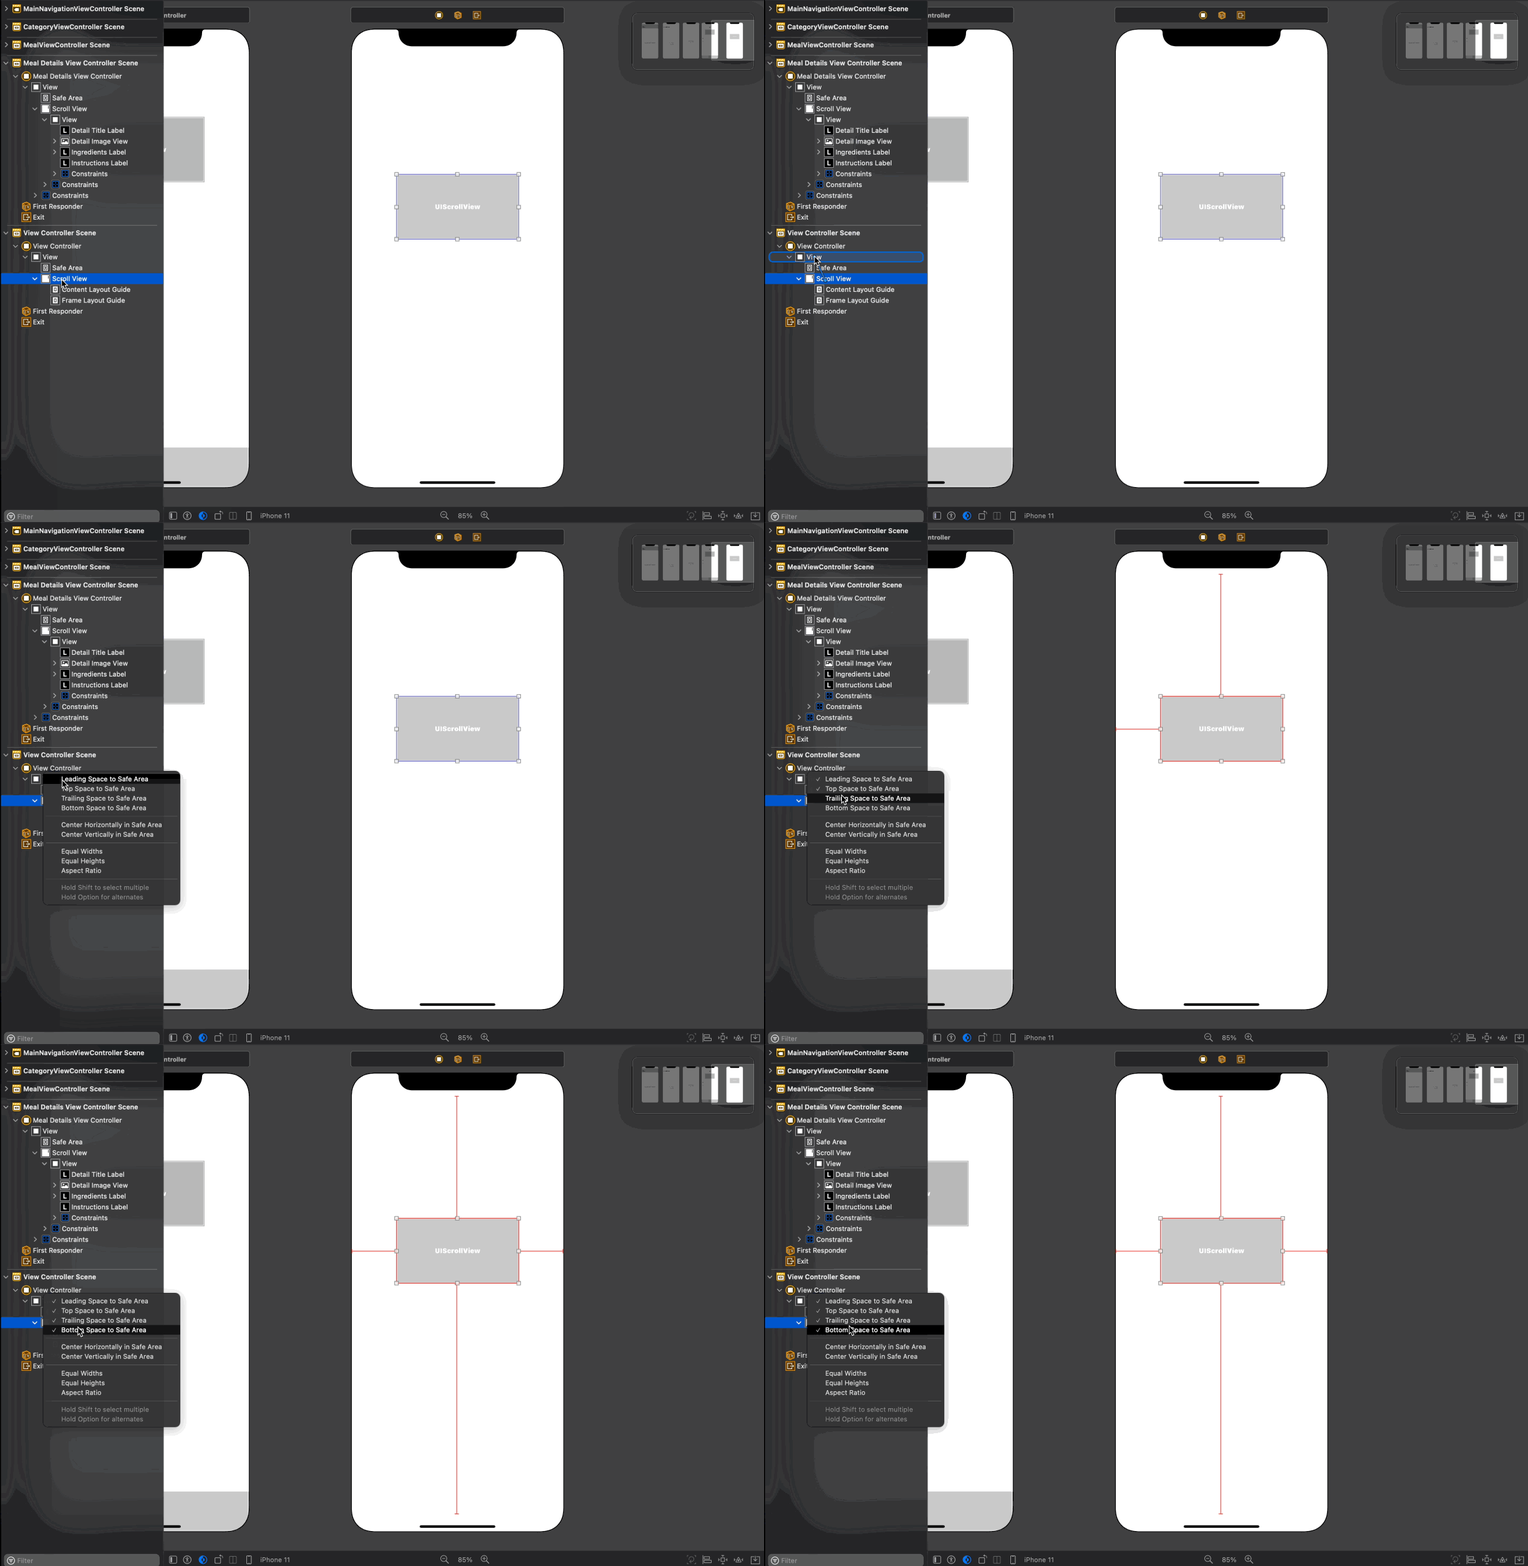
First thing first, we are going to drag and drop a ScrollView to our ViewController from the Library, to open the library you can tap on the small plus button at the top-right of Xcode, or you can just use the shortcut CMD + Shift + L.
First constraints on your ScrollView

Our StackView needs to be constrained to the borders of our parent view, of course, this would depend on the size you want, but it is commonly used to cover the whole screen.
- Hint: You can control-drag your scroll view component from the document outline (just like on the gif above), when the popup appears you can press and hold shift-key and click on all the constraints you want to add, this avoids to dismiss the pop-up each time you pick one of those and add a checkmark instead, then you can just click outside to dismiss the pop-up.
Facing our first constraint issues

Although we have already added the constraint to the borders, the ScrollView gives us errors, this is because it doesn’t know the size of the content inside of it and before digging into it we are going to update the height and width correctly, so we need to stretch our ScrollView to the borders.
Update constraint constants

Now that we already have our ScrollView correctly we can update our constraint values to zero. We can do this without expanding our ScrollView but I prefer doing it in this way.
Also, we could skip this step if we set our ScrollView correctly, then we add the constraints, it is just a way to show you there is no one only way to do things.
Add the content view of the ScrollView

Some developers might prefer to use the views directly, or a Stack, but as a personal preference I like to have a UIView as my content of my ScrollView, so look for a UIView on the library and add it inside the StackView.
For this content, we need to make it as big as our StackView but for this case, we are going to use the Content Layout Guide instead of our parent view, so just as when we add the constraints for the ScrollView to our parent view let’s follow the same steps.
CTRL + drag from our new UIView to the Content Layout Guide and add the top, leading, trailing, bottom constraints, and be sure those are on zero, this last part is important because even if we add them to make our content view as high as our StackView the constraints are not always set correctly, so be sure all the borders are equal to zero.
Setup the width of our content view

For this example we want to make the content scroll vertically, so we need to tell the width is going to be the same as our ScrollView width which is our screen width size.
To make this we won’t use the Content Layout Guide we need to constraint it to the Frame Layout Guide so let’s make our view the same width as it, to do it we are going to use the same trick, CTRL + drag on our UIView and drag it to the Frame Layout Guide and we’ll select Equal Widths, with that we now know the width is the same as our device (for this example), so it won’t scroll horizontally.
Adding our views and constraints

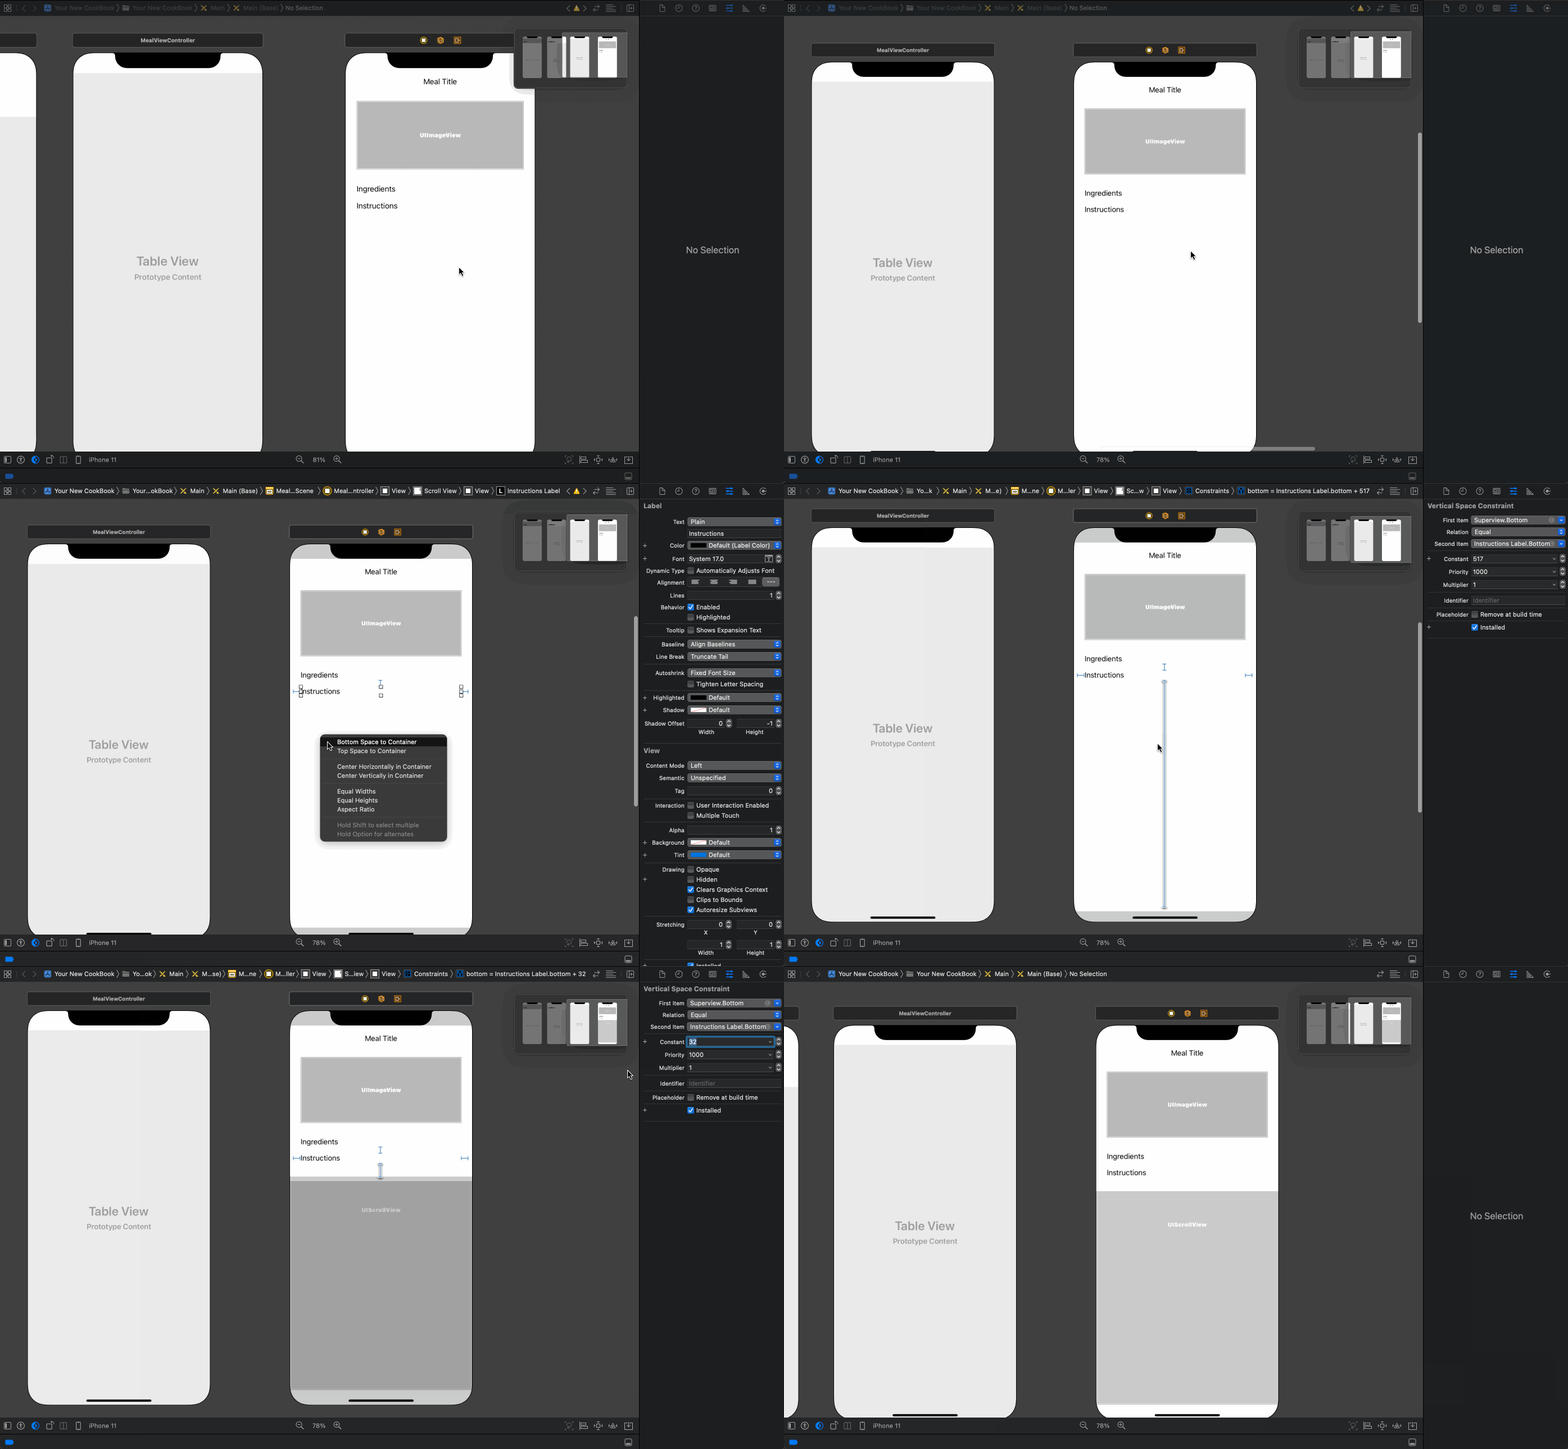
To make our ScrollView work as expected (vertically) we will need to make our constraints work correctly, in this small gif I’m just adding the views I want to show on my final screen and adding the top and leading/trailing constraints.
Using my previous gif as an example, I just didn’t add the bottom constraint, this is to let you know that if we don’t have it the ScrollView won’t know how large is its content, so we are going to still look that issue.
Add the bottom constraint

That bottom constraint is the reason our scroll doesn’t know how big it is, so we need to add that constraint (in my case it was 32 height).
In case you see that your content shrink, that’s fine and it is because your current views are using less space than the screen height, but if that happens the scroll won’t work because it doesn’t need to, but if your views grow like this example (the label can have a lot of text that can make the content higher than the screen height), the ScrollView will be enabled and you can scroll as expected.
Conclusion
ScrollViews is a real pain, and it is really hard to add if we don’t have it already and we have a complex view, fortunately is something that SwiftUI already tackled, and it is really easy there.
Another option is to create our view completely programmatically, it is also easier to add a ScrollView if we have them through code, I hope this post helps you, #HappyCoding 👨🏾💻!.


